

This is a twist on Ashley's repurposed tee into a baby bib on Make it and Love it. Her version was adorable, but girly. I wanted something fun for my little man, so I decided to make an argyle bib. You can follow the original tutorial for how to put the bib together here. One little note: Before sewing the bib pieces together, I ironed on a square of interfacing where the snaps would go. This reinforced the bib.

Now, I'll explain how to get the argyle print on your bib.
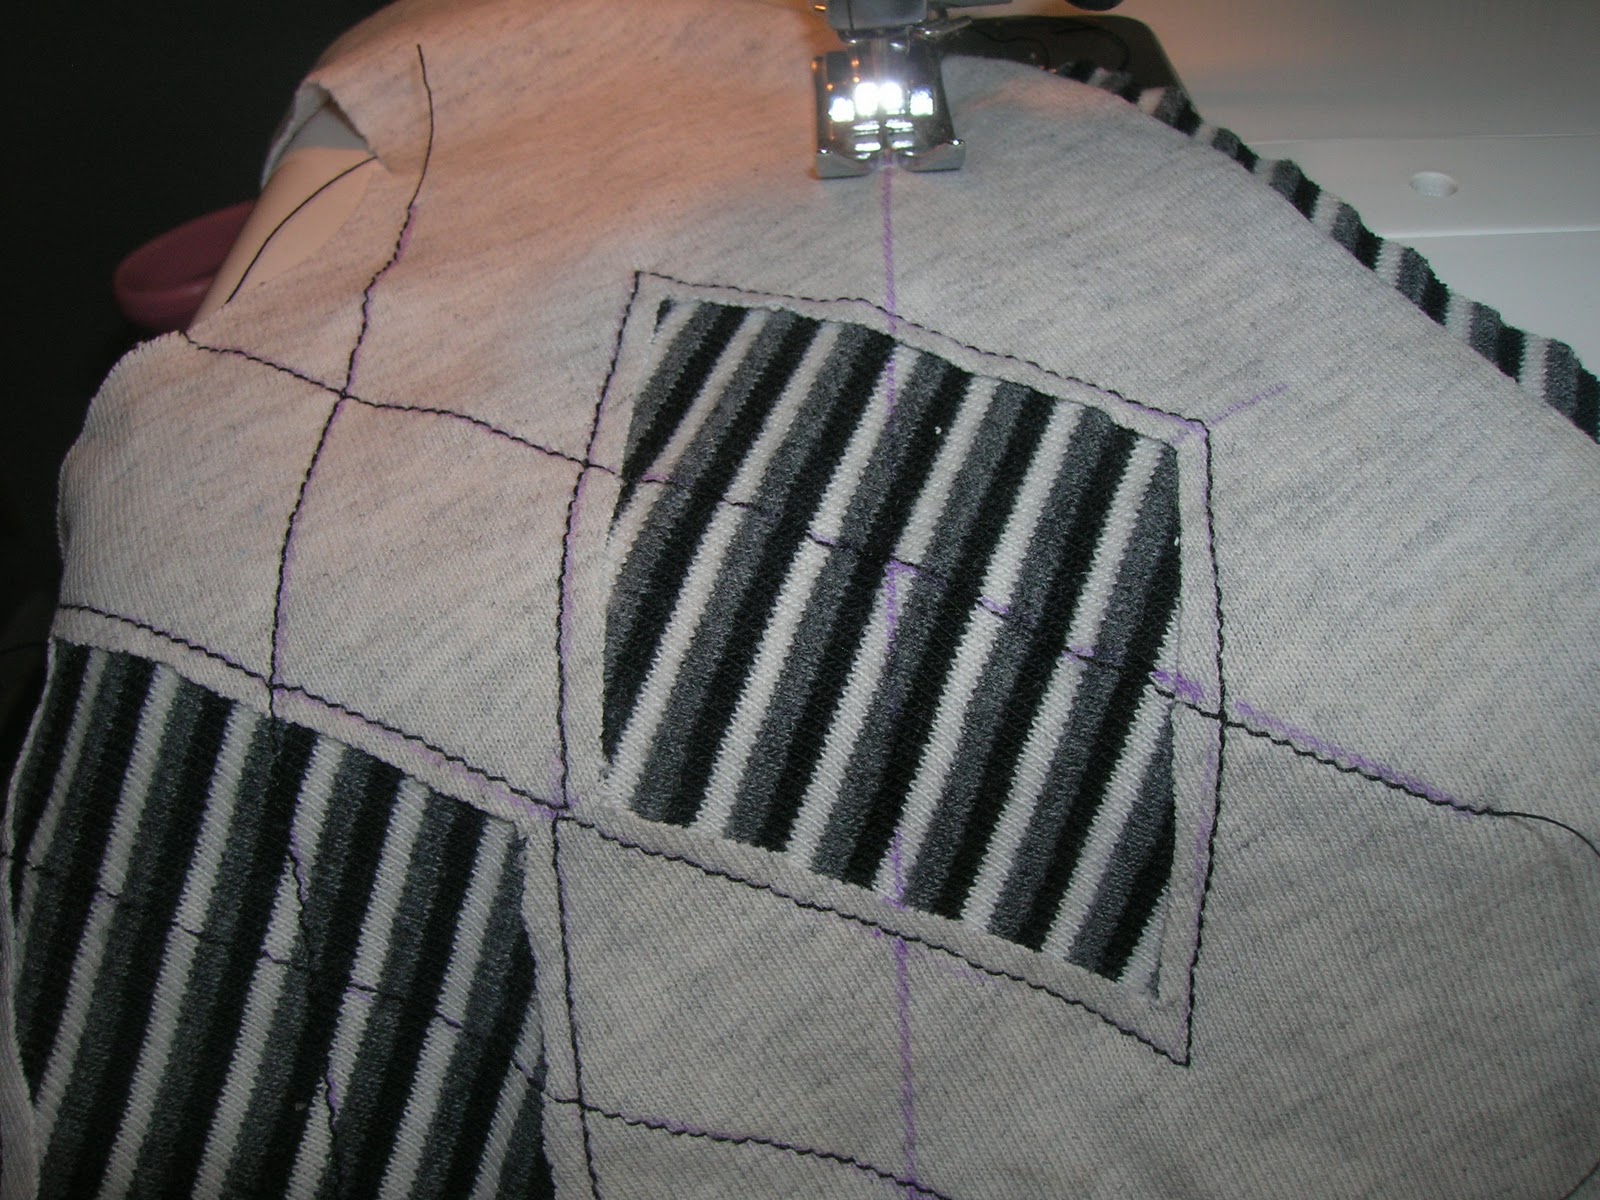
You will cut one extra bib piece and pin it underneath the front piece (this is the striped fabric on my bib).
Next, I made a diamond template on a piece of paper with my ruler. I traced one diamond onto the center of the bib front with a disappearing ink pen. I then used a ruler to draw a straight vertical line across the bib, through the middle points of my diamond. This helped me to trace the two side diamonds straight.

I took my front pieces and sewed where I had drawn my diamonds. Then, I cut away the top material only to expose the stripes.

Next, I placed my diamond template with the side point of the diamond in the center of my center diamond and pinned in place. Using my ruler, I lined up the diamond edges and traced and extended line onto my bib along all four edges.

Repeat on other side of bib.

Lastly, I sewed along all of my drawn lines (except the vertical line I drew earlier to line up the diamonds).
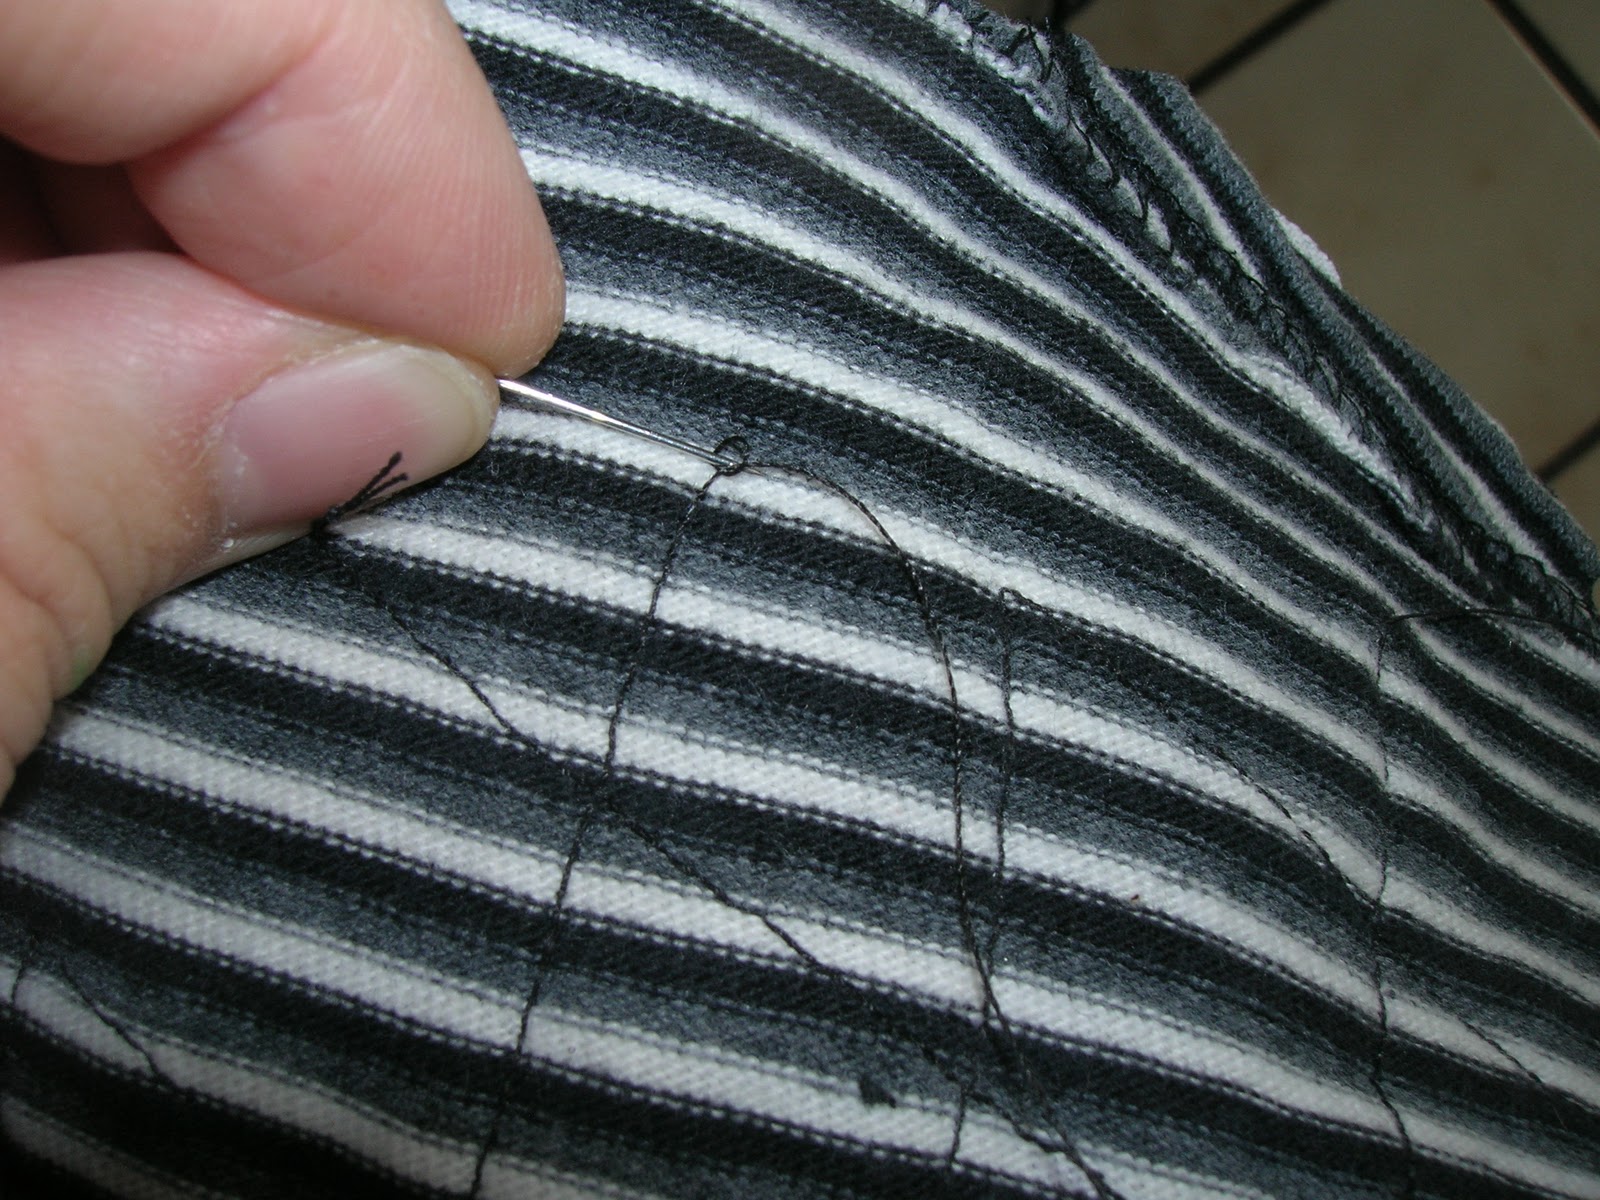
Instead of using a backstitch, I pulled my threads through to the back of the bib front and tied the ends together in a tight knot. This made the stitches look more finished.
And there you have a fun argyle print on your little man's bib!

it's probably inappropriate to refer to an article of one's nephew's clothing as "totally pimp", but that's not going to stop me from doing it.
ReplyDelete