Wednesday, June 24, 2009

Honey Buns, revised


While perusing one of my sister in law's Martha Stewart Living magazines last summer, I happened upon this recipe for Honey Buns and had to scribble it down. It took me almost a year to attempt it, with so many steps and different ingredients, but I'm glad I did. They are sticky-sweet and smell heavenly baking in the oven. The fabulous thing about the recipe is that you make three batches of dough, one to use immediately and two to freeze for later. Well, I pulled one from the freezer yesterday and decided to make more honey buns.

Now, before you go away, gasping in horror at the next part, hear me out on this. I know that, to many, altering Martha's concoctions is NOT a good thing, but I have two items to weigh in for my defense. It is summer, and there are beautiful berries aplenty in the stores now, and I had some perfect raspberries sitting in my fridge practically begging me to use them. Best defense of all, Martha herself, has suggested tucking berries into her cinnamon rolls as a pleasing variation. There, I feel justified.

Here's how I turned honey buns into raspberry buns: I slathered the honey dough in butter after rolling it out. Then I sprinkled generously with sugar and cinnamon. I placed one container of berries on top and drizzled the whole thing with honey. I rolled them up, cut into 9 sections, placed in a 9x9 pan and let them rise until doubled. The original recipe said to bake approximately one hour, but I found that only 30 minutes was all it needed. (Perhaps because you don't add the honey mixture on the bottom of the pan?) Then, I pulled them out of the oven, cooled slightly and frosted them with a canned cream cheese frosting. (I know Martha would prefer a homemade cream cheese frosting, so if it makes you feel better, mix away...)


Seriously, heavenly and summery. We think this variation might be even better than the original. Shh... don't tell Martha.

Happiness is trying a new twist on a great recipe and having it turn out a success. Happy baking, my friends!

Tuesday, June 23, 2009

My Hero


We're still on the hunt for steady work, which means we are still riding the frugal train. Sigh. I miss the mall. And Target. And the Dollar Tree. Pinch pennies we must, but live without recognizing important events, we must not. Father's Day offered no shiny new electronics, or snazzy new clothes. What can you give the men who give daily to you, when you have no money? Along with a good home-cooked meal and a handmade card, here is my humble attempt to say thank you.

To my dad, you gave me a model of manhood to hold as a standard. You encourage. You endured endless hours of math and science tutoring to an over-achieving and tired teenager who desperately wanted to keep that A. You provide advice and strength. You love me and my family and let us invade your home regularly.

To my wonderful grandpas, who are not here physically, but still influence me today. To Grandpa Carpenter, who was the purest example of selfless service I know in this mortal life. To Grandpa Smith, who I wish was still here to offer sound financial and spiritual advice during this turbulent time we are in.

To my father in law, who quietly supports and listens. Who gave my husband a shining example of fatherhood to follow.

To my own personal superhero, my husband. Growing up, I fantasized about being swept off my feet by a prince, of being rescued from certain danger by a mysterious masked man. My prince came. He swept me off my feet our freshman year at ASU. I was smitten and there was no going back. We married shortly after my college graduation, and I felt my childhood fantasies fulfilled. Little did I know that this handsome Prince Charming would also moonlight as my superhero as well. A little after a year of marriage, he saved my life, literally. He rescued me from a real danger. He rushed me to the ER when I insisted I was just feeling a little under the weather. I wasn't just a bit sick, I was in real trouble and he had the strength to listen to Inspiration and act. You cannot put gratitude for something like that into words. So now, even when times are tough, and things aren't going according to plan (isn't that the way it is so often?), I can't help but look at him and smile. I have my own superhero, the father of my children, the love of my life, right here next to me. And I sleep well, knowing he is watching out for me, safe in his arms. Always.

Wednesday, June 17, 2009

Picnic Post, Part 4 Travel Tips


Today's post is all about entertaining kids on the go. My husband's family lives in Southern California, which is a 5 hour drive for us to his parents' home. I have family in Southeastern Arizona, which is a 3 hour drive away. So we are in the car a lot.

I have a few little tricks to make the drives easier on all of us. Here are some of my tips.

1. Bring food for long trips. Make sure it is "car friendly" so you don't have any sticky messes to clean up later. (I made the mistake of giving my 1 year old a juice box once. Never again.) Some good traveling foods: crackers, yogurt melts, cereal puffs, grapes, fruit snacks, dried fruit, pretzels, and animal crackers, and a drink in a spill-proof cup. Just make sure if you have a really little one to give them foods that will not present a choking hazard. I love the wagon wheels that Gerber makes because my boys could chew on them for a while and they weren't too messy.

2. Have a few favorite toys at arm's reach. My boys love cars, so I let them bring a few to play with. Maybe a favorite stuffed animal.

3. We always have books on hand. Some especially good ones for traveling are the I Spy books. The board books are sturdy enough for toddlers, and the readers are great for preschoolers as they have pictures next to the words of the items to find. My boys love looking through them and naming what they see. Because they love cars, this one is a favorite. Let them read some books to you, retelling favorite stories, or read to them, letting them use their imaginations to "see" the pictures. We also enjoy books on tape and The Friend magazine (this is a monthly children's magazine printed by my church) for read-alouds.

4. We have a few "travel/ quiet time toys" that are great on trips. We love our I Spy Bags. You can give your little one a magnifying glass to examine the items for added fun. My older son also likes the lacing cards, and the magnetic Cars story box he was given as a gift earlier (it is a box with some scenes to move little magnetic Cars characters around on). My youngest loves his quiet book, especially the duck page.


5. This Christmas, I made each of my boys an I Spy Quilt for traveling. I found this great idea from makeandtakes.com and adjusted it a bit to fit our needs. Her quilt was a bit too small. I wanted something bigger that they could snuggle up with when the weather was cold in the car. I ended up using 18 different fabrics (two of each print to make 36 squares). I cut the squares 6 1/2 inches square and used a 1/4 inch seam allowance. This gave me a finished quilt that was a yard squared, so I only had to purchase one yard of the flannel I wanted for the back. I also didn't want to tie it, so I machine stitched a square in the middle, around the edge of the center 4 squares, and another square around the next set of blocks. I hope this makes sense. Perhaps I'll post a tutorial later. I tried to pick out fabrics that had lots of different objects on them, things I know my boys would like. I also found some alphabet material and number material so they could practice their number and letter recognition. My oldest LOVES Cars, so I found flannel with Cars characters to back his quilt, and a zoo animal print for my younger son. I wanted them to have as much as possible to "spy" on their quilts. These are a favorite item on trips.

6. Don't forget to just spend some time talking to your kids. Tell them stories about your childhood trips. Point out interesting things along the way. Tell silly jokes. Ask them questions and let them question you. Listen to music together (our favorite cd is the Curious George soundtrack, and I also love 10 for Our Children ). It's OK to daydream and stare out the window. It's OK to just enjoy the quiet. It's OK to nap. Enjoy your kids.

I hope some of these ideas are helpful. I know I'm always excited to hear of new things to make traveling and waiting with kids more pleasant. I can't wait to see all of the other fabulous ideas.

Tuesday, June 16, 2009

More Oceans of Fun

My boys are still loving the ocean stuff. I think Daddy's California roots are influencing them. Not that I mind at all. There's few places in the world I love more than California, especially San Diego. When Mike and I strike it rich and have millions of extra dollars, we will relocate to that beachy city and live in a sweet little (but not too little...) beach cottage. We will lay on the beach, dining alfresco, kids playing happily together in the sand. I will be gloriously tanned, thin and relaxed.

OK, so that's not reality, but a girl can dream, can't she?

Back to the ocean of learning at our desert abode. Here are a few more fun activities to whisk us away to the beach, if only momentarily.

Ocean Puzzles:


These puzzles were shared by some fabulous kindergarten teachers I worked with. They were always a big hit in the classroom, and Andrew liked them as well. You need a puzzle board (cardstock), with only the rectangles and letters at the bottom. The puzzle pieces (also cardstock) have the letters and puzzle picture. I laminated both and cut up the puzzle pieces after laminating. I also made a die (just a blank wooden cube) with each of the letters written with a Sharpie on the sides. You roll the die, and place the puzzle piece on the puzzle board that corresponds with the letter rolled. If you roll the same letter, just roll again. You can easily play with a partner and take turns rolling and piecing the puzzle together. Andrew got frustrated with rolling the same letter over and over, so we did a little "cheating" to finish them up. Whatever works. I also have these puzzles for other themes, such as farm, color words, and cowboys.


Here are the words used for the ocean puzzles. Because you only have 6 sides on your die, you have to be a bit creative in your word choices.

1 fish*
1 crab *
8 arms (octopus)
1 star * (starfish)
2 claws (lobster)
1 horse (seahorse)
1 whale

Fishbowl water color:


Often, paint makes me super nervous, but this art project is a simple one, and not too messy. Either print off a fishbowl outline, or draw one with a permanent marker. Have your child color and ocean scene inside the bowl. The important part is to color DARKLY and not use too much blue. Light, bright colors, such as yellow, stand out best. After you color the scene (do not color the water, leave background white), you watercolor the entire bowl blue. (If you have blue tempera paint, you could water that down and paint with that instead.) Let it dry and you have a fun little fish bowl. For a little extra pizzaz, when I taught, I would sometimes make a black construction paper fishbowl, cut out the center, and put extra laminating film on the inside and staple this to the front of the painting to make it look like a "glass" fishbowl frame.


Finding Nemo Concentration:


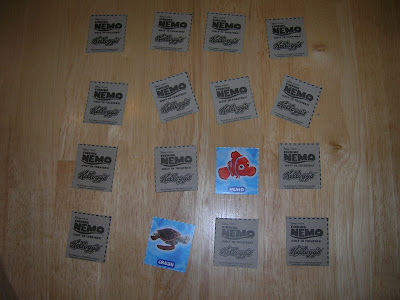
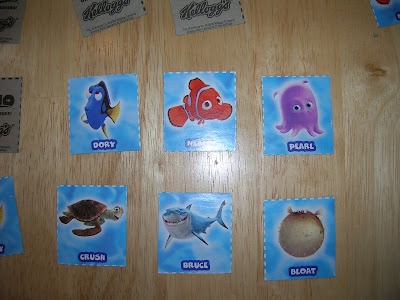
I actually cut this off of a Kellogg's cereal box many moons ago and saved it. I am glad I did. There are only 8 matching pairs, which is just about right for us now. I'm sure you could just as easily use some clip art and make your own set. I liked that the names were printed below the pictures, and that there are more than just fish.

Monday, June 15, 2009

Celebrating Independence, Part 2


In a past post, I celebrated Number One's newly found independence. Well, Number Two is not to be outdone in the independence area (even though he is much younger...) Here is his first "declaration of independence".


For all of you that know my Ben, you know that he has basically been attached to my hip since day one. Literally. This is the baby that had to be held all waking hours. If put down, he would scream and cry until picked up again. I am not talking the sweet, petite whimper of a newborn, I am talking about the screaming, "you are ruining my childhood" desperation cry. It's not pretty. It was guilt inducing and maddening. It would last for a full 45 minutes if I were trying to put together a dinner. As soon as I picked him up, it would be rainbows and sunshine immediately. At 18 months, he still wants to be held, but really enjoys being on his own more now. I never thought the day would come where he would actually run away from me...

Never say never.


I should have known this was coming. He was beginning to get a mischievous glint in his eye as I would try to dress him in the morning. Sometimes he'd run off, laughing, to avoid clothes. It was only natural that this little taste of freedom would spill into other venues.

During church a few Sundays ago, all was (relatively) quiet. Ben was playing in the aisle in the back of the chapel. I didn't think much of it, after all, this is the child who needs to be within eyesight or touching distance of me at all times. Then, he started getting a bit further away. Then I saw that little glimmer in his eye. I braced myself. I fiercely whispered, "No, no, come here honey!"

Like that ever works.


Then, in a bold step, he took off. He ran. He laughed. He made it all the way to the front of the church. I was terrified he might make it to the pulpit. I had to chase him. That little stinker is FAST! I snatched him up and luckily he didn't start shrieking. I think we provided some great entertainment for the members. I heard several snickers and saw a few "I've been there" grins. Thank goodness most people in the church understand that sometimes a little boy just needs to express his independence.

Part of me was saying, "That naughty little boy!" I have to admit that another (much smaller) part of me was saying, "Way to go!" I want my kids to have wings to try new things and to run on their own. I guess I just have to work on teaching them WHEN and WHERE it is appropriate to spread those wings and give them a trial run.

*Note: All of the beautiful pics were taken by my super-talented sister Sarah. The girl has a gift! Thank you Sarah.*

Thursday, June 11, 2009

Picnic Post, Part 3


I am very excited about this edition of the summer picnic at ABC's and 123's, mainly because I know there will be some great ideas from all the other picnic'ers out there. I love a good crafty project. Today, I decided to share a crafty project I did FOR my kids to enjoy and a few of my favorite projects that I used to do in my kindergarten class WITH my kids. My boys are more interested in doing their own art, and not so much into doing a structured art activity. I am fine with that. Enjoying art for art's sake is important, too, and I think it encourages creativity. I do want to do more little projects with them also, to help expand their skills and practice following directions.

For free art, my boys love playdough, coloring and decorating with stickers and stamps on plain paper, and using a dry erase marker on laminated paper and white boards.

For one of my favorite craft projects FOR my kids, I made I Spy bags. See this post for a tutorial and explanation of my variations. I know a lot of people have posted different versions of this activity, but it's still a favorite at our house.

Now, for my projects to do WITH kids. I know most of us have moved on to summer themes and activities, so sorry about the springy nature of these.

Stained Glass Butterflies:

You will need:
liquid starch (It must be liquid starch, you know, the one in the big blue bottle. I have found it easily at Wal-Mart)
water
shallow container (like an old pie tin or plastic frozen dinner tray)
paint brush
small squares of colored tissue paper
wax paper
sharpie
pipe cleaner
your favorite adhesive (I would use a low-temp glue gun, but you could use a piece of clear tape to make it easier)

1. Trace a butterfly outline with the sharpie on a piece of wax paper.

2. Dilute the liquid starch with water (I used approximately even amounts of starch and water) until you get a thin "paint" consistency.

3. Paint the wax paper and layer the tissue paper squares onto the butterfly outline. Paint the tops of the tissue paper gently with your starch mixture as well. Make sure to overlap the pieces and go all the way to the edge and a bit over the outline. You want good layering so the wings will be strong. I told my students there should be no holes in the wings (real butterflies couldn't fly with damaged wings after all).

4. While the outline dries, twist a pipe cleaner into a butterfly body.

5. Let the wings dry (overnight is best).

6. Cut out the outline (tissue paper and wax paper are still stuck together) and peel the wax paper off of the back.

7. Glue your butterfly body onto the wings.

8. Hang in a window for a true "stained glass" effect.

Butterfly Rings:
For this project you will need:
copy of a butterfly (I'm sorry I don't know where mine came from, but I'm sure that you could easily find a black and white butterfly online or in a clip art book that would be similar.)

1/3 to 1/2 of a pipe cleaner
markers
hole punch

1. Color the butterfly with the markers. Try to make the wings symmetrical, so it will be more realistic. (I used this project to reinforce the concept of symmetry. We're not there yet at our house. That's ok.)


2. Carefully cut out the butterfly. Something I found helpful when cutting a difficult outline is to make an outline where you want the kids to cut with a bright colored crayon. That gives them a better cutting guide.

3. Punch two holes in the butterfly outline, close to the top on both sides of the body.
(This is my example. You could see the holes better in this one.)
4. Bend the pipe cleaner in half and insert into your two holes, leaving the ends poking up.

5. Have your child put their finger in the loop made by the pipe cleaner, like a ring.

6. Twist the pipe cleaner together to form the ring, then curl the ends down to make the butterfly's antennae.

7. Let your child "flutter" around the room with their butterfly.

Friday, June 5, 2009

I Spy Bags

For an enrichment activity a long while ago, we made I Spy Bags for our kids. It was so simple (after lots of trial and error) to put together, and my kids love them. I decided to take the concept a step further and make some for my kindergarten class. I wanted to reinforce the concepts taught there, so I created color bags and alphabet bags. In the color bags, I put one object for every color inside. (ex: a red button, a blue car, a brown penny) For the alphabet bags, one item for each letter of the alphabet (this one was a lot trickier) and alphabet beads A-Z.
Here's my short tutorial on how to make them:

You will need:
2 7"x7" squares of fleece
1 4"x4" square of clear vinyl (I used a medium weight vinyl, the kind you use for table covering)
approx. 1 1/2 cups of Poly Pellets
various small items to hide in the bag (some examples, button, pom pom, feather, plastic bug, bead, marble, etc. -try and use things you already have laying around your house, be creative...)
sewing machine, thread, scissors
1. Cut a 2 1/2"x2 1/2" square in the middle of one piece of fleece. (I folded my fleece square into fourths, measured 1 1/4" from center and cut)
2. Using a zig zag stitch, sew the vinyl window onto the fleece window. You will have extra vinyl around the edges, trim around the edges to about 1/2".
wrong sideright side
3. *optional* Pin a small rectangle onto the center, right side, of the back piece. Sew around edge, using a straight stitch, leaving the top edge open. This will be a pocket for your item list.
4. Straight stitch the back fleece onto the front piece, wrong sides together, leaving the majority of one side open.

5. Fill bag with Poly Pellets and your items. You need some "breathing space" inside the bag, so that you can maneuver the pellets around and find your objects. Do not fill up all the way, or bag will be too full.
6. Machine stitch the open edge closed.
7. *optional* Make a list of items on your computer, cut and laminate. Place in back pocket.

To take it a step further, I created an I Spy worksheet for the children to fill out as they found objects. I had the letters (or color words) listed on the sheet with a line to write the name of the object found. If you wanted to use this for younger children who cannot read, you can have them check off on the line when they have found the correct item on the list.

This was a favorite activity in my class, as well as a great quiet activity for my children at church, waiting in the doctor's office, in the car, etc. Enjoy!

In case anyone is interested, here is a list of what I put in the ABC bags, if you need some ideas.

a set of alphabet beads a thru z
A: plastic ant
B: baseball eraser
C: plastic cactus
D: plastic dinosaur
E: plastic elephant
F: feather
G: plastic gorilla
H: heart eraser
I: ice cream cone eraser
J: jewel (sparkly bead)
K: key
L: leaf
M: marble
N: necklace (small piece of a plastic bead strand)
O: plastic octopus
P: penny
Q: quarter
R: piece of ribbon
S: plastic snake
T: turtle eraser
U: umbrella (the kind you get in fancy drinks, still folded)
V: Valentine (I just used Valentine paper and folded like a card)
W: plastic whale bead
X: small laminated picture of an x-ray
Y: piece of yarn
Z: plastic zebra

Oceans of Fun

For the summer, I have pulled out my ocean-themed activities and books to explore with Andrew. He loves picking a story (or two or five...) about ocean animals. I try to have a variety of fiction and non-fiction books for him to look at at read. We especially love Rainbow Fish and the non-fiction readers. Ben even enjoys sitting and listening to the stories.

This is one of the activities that we have tried a few times this week that Andrew has really enjoyed.

Fishy Numbers:

Before starting this activity, or any new activity, I think it is so critical to just let children explore and play with the new manipulatives for a time. Then, you can use them for more specific activities.
I first had him trace the numbers for practice. (I LOVE my yellow highlighter! It is easy to write for me, and easy to see and trace over for my kids. Even better, after they have traced over the highlighted numbers, words, THEIR work is what shows up, not yours.)

Next, I dictated numbers for him to write on the laminated posterboard (with a dry erase marker), one in each box.

Then, I had him put the corresponding number of fish in the boxes. He had so much fun picking the fish and making patterns in the box.
After he finished, I had him re-count his fish, out loud for me. I had him point to each fish as he counted (one-to-one correspondence), and asked him what to do if the correct number of fish were not in the box (problem solving).
The next day after doing this activity, he asked to do it again. Success!

Fishy F's and a little impromptu graphing:
(Sorry this picture didn't turn out, it's very light.)
Using a set of ocean animal stamps, I first let Andrew make an ocean scene. He loved stamping all over his paper. Then, I had him stamp the upper and lower case f's on a new sheet of paper. We talked about how fish starts with f and practiced it's sound. Then I let him play with the stamps on his own, since he was still having fun with them. He independently stacked the stamps like this:
Naturally, this looks like a graph to me, so we talked about it. Which stamp has the most? The least? Do any have the same amount? How can you tell? So much fun!

Wednesday, June 3, 2009

Prize Picnic, Part 2

I'm back for the second week of the Prize Picnic at ABC's and 123's. Have you checked them out yet? You should, because there are some great ideas here for those of us with young children. Learning is fun!

For this post, I am sharing some of my favorite letter/ABC activities. I have to say that my favorite letter "activity" deals with the letter M. When my oldest was about 2, he started pointing out all of the M's he found around the house. After delighting in seeing him learning, I was curious to know how he figured this out. Then I heard him say, "Look Mommy, M, like the M&M's!" Oh the power of candy. Let it never be said that chocolate isn't brain food...
In all seriousness, one of my favorite M activities is one many people probably already know about: M&M graphing. I use two worksheets, one sorting mat and one graphing sheet. For younger children, I would color the M&M's on the mat and on the bottom of the graph so they could match their candies without having to read the color words. Use either a generous handful of M&M's from the big bag, or give them a small snack size bag of their own. Kids love sorting and graphing their candies.

I know this is a math-related idea, but you can tie in letter name and sound recognition so easily. One of my favorite ways to help kids remember the sound M makes, is to remind them of the sound they make when they eat a yummy M&M (mmm....). Perfect.
Another fun activity I used over and over when I taught kindergarten was sound sorting. Did anyone else grow up using the letter books in kindergarten? I used the black and white sound worksheets to create picture cards for this game. (You could just as easily use clip art or web images.) I colored and laminated the pictures, and wrote the target letter on the back of the pictures, to help keep them organized. (All of the pictures would have an M on the back, even if they didn't start with an M, because they went with the M game. Make sense? Or, if you wanted to make it self-correcting, you could write the correct beginning sound only on the back of the cards that started with the target letter.) Inside the file folder, I placed the target letter on on side, and left the other side blank. Then the children could name the pictures and sort them by their sound. After sorting, I would have them say all of the pictures that began with the target letter, just to reinforce the beginning sound.
In keeping with the alphabet theme, I have so many alphabet books that I love, so I'll just choose a few that I particularly enjoy.
* Animalia by Graeme Base
* Bad Kitty by Nick Bruel (This is hilarious!)
* the alphabet tree by Leo Lionni (so great to explain what letters do)
* Tomorrow's Alphabet by George Shannon
* of course, Chicka Chicka Boom Boom by Bill Martin, Jr.

I hope you enjoyed this little letter journey. Now go and read a great book to a deserving kiddo!

Tuesday, June 2, 2009

A Tip of the Hat to the Jolly Old England of Yesteryear


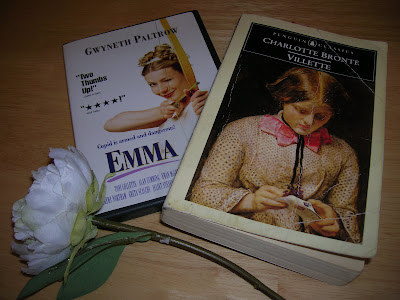
Do you love my title? I have been languishing in the world of the 19th century England of Charlotte Bronte and Jane Austen of late. I close my eyes and imagine myself amongst the elegant high-waisted gowns, satin gloves, carriages, tea times, and English gardens. I am in the midst of reading Vilette, by Charlotte Bronte. How can it be that it has taken me so long to discover this treasure? It started out a bit dry, but I am now totally enthralled. Any excuse to use words like, "languid, endeavoring, fastidious, and hitherto" or phrases like, "where Hope flew before him fast, never alighting so near, or lingering so long, as to give his hand a chance of one realizing grasp." Of course, there's unrequited love and a ghostly nun. I loved Jane Eyre. This novel may be just as good, if not better.

My Dear Friend, Jordyn lent me her copy of Emma (the fabulous adaptation with Gwenyth Paltrow). I watched it last night and had to rewind and watch a few scenes again. The beauty of some of the lines gave me goosebumps and whispered of Truth and Joy. (Don't you just love to capitalize Important Words?) Here are my favorite little gems from the aforesaid movie:

After professing his love and Emma expressing her doubt in her own worthiness, Mr. Knightly says: "Maybe it is our imperfections that make us so perfect for one another." So, so true.

In conversation with her friend Harriet Smith, Emma states: "I hope you know that I only wanted your happiness. Now that you have found it, it makes my own complete." Isn't that perfection?

I am chagrinned to admit that I have not actually read Emma. It is on my list. I just loved the movie so much, I never bothered to read the "real story".

Then, I serendipitously found this post from Conversations With a Cupcake today, replete with Austen and Bronte quotes, and have decided I must try this out. Anyone up for a good girl's night out with some English desserts and a great sappy Austen flick? Jolly good fun. Cheers.