Thursday, October 15, 2009

Sick Days


temperatures and Tylenol
raspy coughs and teary, bleary eyes
dimmed lights and sleepless nights
anxious sighs and lullaby's
hugging arms that wish to take the hurt away

PBS Kids mornings and Disney movie afternoons
story books and cozy blankets
cooling baths and warm, steamy showers
more liquids and less dinner
extra prayers and teddy bears
thankful hearts when ails depart


These are what sick days are made of.

Wednesday, October 14, 2009

Flowery Tee Makeover

before washing

I have seen several tutorials for making over a simple tee shirt into something a bit more feminine and flowery. I found this tutorial at Hope Studios and my sisters, mom and I tried it out. I ended up putting seven rosettes on my shirt.

after washing

The flowers shrink up a bit after washing, so if it looks too full, know it will thin out a bit. The shirts turned out so cute and still look great after a few washes. After washing, the petals crinkle a bit more. This was a simple project. It took about an hour total to finish, and there was no machine sewing involved. If you are a bit intimidated by all of the clothing refashioning that is the big craze right now, this is a perfect starter project.


Here I am in my new cute tee with my cute family. I'm in San Diego, so that would explain the big, cheesy grin.

Friday, October 9, 2009

Pumpkins Galore!

Today I'm sharing a few fun ideas I have accumulated about pumpkins. I only wish that we could get to a pumpkin patch this year to see some in real life. I guess pictures and projects will have to do for now.

Let's begin with some of my favorite pumpkin book picks.

It's Pumpkin Time by Zoe Hall

This book has bold and bright collaged illustrations with an easy to understand explanation of the pumpkin life cycle.
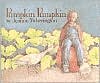
Pumpkin Pumpkin by Jeanne Titherington

This book is suited for the youngest children, with a simple telling of the pumpkin's life cycle in words and beautiful, lifelike, feathery-like, colored pencil drawings.

Pumpkin Jack by Will Hubbell

This book is another pumpkin life cycle, but it starts at the end of a pumpkin's life, as it begins to decay through the seasons. The delightful surprise in the end is that, while Pumpkin Jack is decayed and no longer visible, his seeds regrow and we watch as several new pumpkins grow in his place, and Jack is back!

The Pumpkin Book by Gail Gibbons

If you have not already discovered Gail Gibbons, she is one of the best non-fiction writers for younger children. This book is filled with facts about pumpkins and lots of illustrations. It is a longer read, and you may want to skip some of the history that goes over young children's heads, but it is worth picking up.

The Runaway Pumpkin by Kevin Lewis

This sing-songy, rhyming book tells the story of what happens when the curious Baxter boys cut a giant pumpkin off the vine on top of a hill. All the Baxters begin to think of the wonderful pumpkin goodies that could be made with this runaway pumpkin. See what happens as the pumpkins and the Baxters come down the hill.
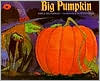
Big Pumpkin by Erica Silverman

A fun Halloween story about a witch's big pumpkin and the creatures that try to help her pick it. It has a fun, repetitious rhyme and a cute message about the importance of working together.

Five Little Pumpkins, pictures by Dan Yaccarino

This is the classic Halloween poem, illustated with bright, simple images that bring the poem to life.

Pumpkin Tear Art


I drew a pumpkin outline on regular copy paper, then cut 2 inch strips of orange construction paper. They colored the pumpkin stem and I cut out the outline. I had the kiddos tear the strips and make squares (or something close to it...) and glue them down one at a time, overlapping and making sure none of the white peeked through. (Tearing is a great fine motor strengthening exercise.) I gave them a black mouth and then let them choose what shapes they wanted for the eyes and nose, and cut those out for them to glue on. This was something I loved doing for my bulletin board when I taught, and I was a little unsure how difficult it would be for preschoolers. I was pleasantly surprised that they really needed little help layering the paper and filling up the pumpkin, or placing the face on their finished pumpkin.

Pumpkin Life Cycle


This came out of a book from Creative Teaching Press from the Celebrate the Months series (October, grades K-3 edition). I tried to find this series on the publishers website, but it looks like it is out of print (again, sigh...). This series has some great ideas, although you will need to simplify and adapt them for preschool. I loved that this life cycle went in a paper sack and you could make the pumpkin grow. If you don't have this book, you can easily make outlines of the pumpkin life cycle stages and make one of your own. I hot glued a real pumpkin seed (you can find roasted ones all over stores now for very little money) on a length of green yarn. Then the kids color the flower yellow, the little pumpkin green and the large pumpkin orange. Tape the shapes onto the string in order and let them pull them out of the bag, seed first, and watch the pumpkin grow.

Pom Pom Pumpkin Pick-up


I have these cute little pumpkins and bunches of pom poms. I let the kids use tweezers and tongs to pick them up one at a time and put in the containers. Even the babies liked this activity (my 22 month old loved picking them up with his fingers and putting them in the pumpkin). Then they could shake them out and try again. You could even give the pumpkins to one child and let them sort the pom poms by color, or practice counting them as they are picked up.

Jack-O


Instead of bingo, we played Jack-o, with a pumpkin patch on the top of the bingo card. You could really put anything on the cards, pictures to practice beginning sounds, numbers, shapes, whatever you are working on to reinforce your learning. Let them use pumpkin seeds or candy corns to cover their spaces. This was an old copy that was passed on to me from other teachers.

Pumpkin Seed Count


I made up this game as a way to practice number recognition and counting. I had two or three sets of laminated pumpkin seeds with numbers 1 through 10 printed on them. I placed those in one jack-o-lantern basket.


I put real pumpkin seeds (more from the roasted ones I bought for the life cycle) in the second basket.


Each family member got a little jack-o-lantern container to hold their seeds. We took turns drawing a numbered seed, and counting that many real seeds into our little containers. We played three or four rounds and then dumped our seeds and counted to see who was the winner. If your child is too young to count that high, you could line up the seeds, making a graph on the floor so they could see who had the most. In another variation, you could reduce the numbers you put in the basket (only use 1 through 3 for example instead of 1 through 10). Both of my boys really enjoyed this little game.

Five Little Pumpkins


I happen to love this little poem, so I had my kindergarteners make this little art project and we printed the poem on the back.

If you don't know it, here are the words:
"Five little pumpkins sitting on a gate.
The first one said, "Oh my, it's getting late."
The second one said, "There are witches in the air."
The third one said, "But we don't care."
The fourth one said, "Let's run and run and run."
The fifth one said, "I'm ready for some fun."
"O-ooooooo," went the wind and out went the lights,
And the five little pumpkins rolled out of sight."

For the picture, we glued popsicle sticks on the bottom for the gate.
I then gave the kids five orange squares or rectangles. They clipped the corners to make a pumpkin shape. If this is too difficult, you could draw pumpkin shapes (circles and ovals) for the kids to cut out. Glue the pumpkins on the gate and make faces with a black crayon. Color the night sky with a white crayon (this shows up better than mine that used yellow and blue...), or give them some sticker stars. Glue the poem on the back.

Pumpkin Cookies


And now, for my favorite pumpkin activity. Decorating pumpkin cookies. This is a family tradition of mine from childhood. It just didn't feel like fall until we had baked and decorated at least one batch. This is an old recipe and different from the one that is on the site for Libby's canned pumpkin, so that is why I am retyping it here.

Libby's Great Pumpkin Cookie

4 cups all purpose flour

2 cups quick or old-fashioned rolled oats, uncooked

2 teaspoons baking soda
2 teaspoons ground cinnamon

1 teaspoon salt

1 1/2 cups butter or margarine, softened
2 cups firmly packed brown sugar

1 cup granulated sugar

1 egg

1 teaspoon vanilla extract
1 can (16 oz) Libby's solid pack pumpkin


Preheat oven to 350 degrees. Combine flour, oats, soda, cinnamon and salt; set aside. Cream butter, gradually add sugars beating until light and fluffy. Add egg and vanilla; mix well. Alternate additions of dry ingredients and pumpkin, mixing well after each addition. For each cookie, drop 1/4 cup dough onto lightly greased cookie sheet; spread into pumpkin shape. Bake at 350 degrees 20-25 minutes until cookies are firm and lightly browned. Remove and cool on metal racks. Decorate with frosting and candies.

Makes 32 large cookies.

Variation, add 1 cup chocolate chips or raisins to dough and enjoy
unfrosted. (We never do this, frosting is much too fun!)

A few notes: This is definitely a cookie that you want cooked well. If you are a gooey cookie lover like me, don't under cook this type. They really will seem firm and slightly browned when they are done.
We always use cream cheese frosting (you can tint it orange to look more pumpkin-y) and usually use the following candies to decorate the pumpkin faces: Smarties, M&M's, Reese's Pieces, Candy Corns.


My kids loved decorating the faces and of course, enjoying a sample or two of their handiwork...

All of this pumpkin talk is making me hungry for a cookie!

Tuesday, October 6, 2009

Apple Treats


My memories of Labor Day are filled with the scent of apple orchards. Just about every Labor Day weekend, my family would travel to southeastern Arizona, where both sets of my grandparents lived for a long weekend visit. Monday usually meant a trip to nearby Mount Graham and Angle's Orchard. We would load up the cars with family and go pick apples in the afternoon. It was always a fun day, filled with cousins and lots of tasty apples (of course you have to eat as you pick!).

Although some Labor Days were hotter than I wanted, the walk through the orchard longer than expected, and the bugs sometimes too plentiful, the boxful of apples that came home with us down the mountain were certainly worth it.

This year, we missed the excursion up the mountain in order to spend a bit more time with our California family. Luckily, our Arizona family still loves us, and shared some of their bounty this year. We have been in a state of apple happiness for a month now.

In honor of apple picking season, here are two of my all-time favorite apple recipes. The wonderful thing about both is that you can use your older apples that maybe aren't firm enough anymore to eat by themselves. Waste not, want not...

Apple Crisp

4 cups sliced and peeled apples (approx.6 apples)
1/2 cup flour
3/4 tsp. nutmeg
3/4 tsp. cinnamon
1/3 cup butter, softened
1/2 cup rolled oats

Heat oven to 375 degrees. Place apples in greased 8x8x2 pan. Blend remaining ingredients until mixture is crumbly. Spread over apples. Bake 30-35 minutes or until apples are tender and topping is golden. Serve warm. (Even better with a bit of vanilla ice cream on top...)

Apple Streusel Muffins

Topping:
1/2 cup nuts (I prefer pecans)
1/4 cup flour
3 Tablespoons sugar
2 Tablespoons butter
1/4 teaspoon cinnamon

Muffins:
1 1/2 cups flour
1/2 cup sugar
2 teaspoons baking powder
1/4 teaspoon baking soda
1 teaspoon cinnamon
1/4 teaspoon allspice
1/4 teaspoon salt
1/4 stick (2 Tablespoons) melted butter
2 eggs
1 cup sour cream
1 cup diced apples

Preheat oven to 375 degrees. Mix all ingredients for topping until crumbly and set aside.
Mix wet ingredients together and fold in apples. Mix dry ingredients together, then add to wet ingredients until just combined. Divide batter into greased muffin tins and sprinkle topping on each. Bake for 20-25 minutes. Best served warm.

Happy noshing!

Monday, October 5, 2009

More Apples

Here are a few more fruits of our labor from our apple unit.

Apple concentration


I made a simple concentration game using some apple stickers I had in my stash. The board is a full sheet of poster board, cut in half. I placed apple shaped stikki notes on the posterboard and laminated the two pieces before taping together with clear electrical tape (leave a small gap between the two pieces so that the board will fold neatly). These boards make it easier for kids to place the cards in an orderly manner.


Because many of the apple stickers were very similar, this was great visual discrimination practice. I also had the kids describe the differences to me (ex: "This one has a fat worm on the side, this one has a long skinny worm on the side, so they are different."), so it became some good vocabulary practice as well.

Tissue paper apples

I drew an apple shape with a leaf and stem on a white piece of constrruction paper and cut it out. I then let Andrew color the leaf and stem, then he used tissue paper squares to fill in the apple. (We used the old-school "wrap the tissue on the end of a pencil and dip in glue and paste on" method.) This gives the apple some dimension.

I recommend this art project for the older preschooler set, because it is time consuming and requires quite a bit of coordination. If you want to adapt it for younger children, just have them use a glue stick and lay the tissue paper squares flat onto the apple shape.

Letter matching


I die cut 26 apples and 26 worms, wrote the uppercase alphabet on the apples and the lowercase alphabet on the worms and laminated them. Kids can then match the worm to the corresponding apple with the same letter.

Apple lacing


This is one of the foam shapes I used here to make a bunch of lacing cards. I just gave the kids the apple and a green lace, so they could have the "worm" eat around the apple.

Apple tree snack


I found this cute idea in an old issue of The Mailbox (a fantastic resource...). You have the kids frost the top of a graham cracker quarter and one side of a Ritz cracker with green frosting. Stick the graham cracker end with the frosting under the frosted Ritz to glue the pieces together. Then add 4 m&m's (red, yellow and/or green) to the top of the tree and eat. My kids loved this activity and requested we make "trees" again the next day (and the next...).

Enjoy the "fruits of your labors". Tomorrow, I'll post a few apple goodies for the whole family to enjoy!

Thursday, October 1, 2009

Apple Activities

We have been spending some time learning about apples in September. Here are some of the books I used and a few activities.


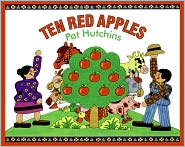
Ten Red Apples by Pat Hutchins

With this story, the kids had fun repeating the animal sounds and counting the apples left on the tree.


We took turns removing an apple from the tree with each page in the story. (I used a copy of the apple tree the kiddos colored and placed the construction paper apples I used for patterning later it to take off of the tree.)

We colored our own apple trees and added ten red apple stickers. We also made an apple mobile.


Ten Apples Up On Top by Theo LeSeig (Dr. Seuss)


We completed this cute little book after reading the story, adding apple stickers on top. This was something I copied from a fellow teacher when I taught kindergarten. It was always a favorite. The book is a regular 81/2 by 11 sheet of paper, but you fold it the long way, so it is tall. I copied the pages back to back, so you only have to use 2 pieces of paper. The title page had some clip art apples and says "Apples on Top" by_______. Inside, each page has an animal and the words "1 apple on top" "2 apples on top." etc. up to "5 apples on top." The kids read the number word on the page and add that many apples on the animal's head. (Sorry the picture is so hard to read.)


Another fun book idea that I found was to either photograph each child standing and cut out and glue it to the bottom of the page, or have them draw themselves on the bottom of a large sheet of paper. They then added how many apples on top they wanted (stickers or have them draw the apples) and filled in the blanks. ______ has ___ apples on top. (ex: Andrew has 4 apples up on top.) This is a fun class book. We didn't do this one, so sorry, no picture.


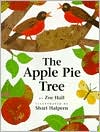
The Apple Pie Tree by Zoe Hall


We made apple patterns.


We sequenced an apple being eaten.

Little Green Worm Finds a Home

This was a story and activity I found in a Scholastic publication. I found the words to the story posted on the web here. I searched for the book, and found it here but it appears it is out of print.

I had the little pictures to put on my flannel board and word strips with the requirements for little worm's new home. I wanted to buy a piece of each fruit, but didn't get to the store on time. We did cut open an apple to look at the star at least.


We used playdough worms to make the letters of the alphabet that I had printed on apples that were laminated. Sometimes homemade playdough is crumbly and a bit hard to roll out, so I had my 4 year old use this "noodle squirter" tool to make his worms. Then he could just push them together, or break off pieces to get the right lengths.

More apple goodies coming soon...

A Fall Treat


Dry Roasted Peanuts
plus
Candy Corns (do yourself a favor and splurge for the real Brach's brand, all others are inferior)
equal
crazy delicious.

If you have never tried this simple little combination, and you are skeptical that these two things can really taste good together, go to the store, pick them up and try.
You will thank me later.