Apple concentration

I made a simple concentration game using some apple stickers I had in my stash. The board is a full sheet of poster board, cut in half. I placed apple shaped stikki notes on the posterboard and laminated the two pieces before taping together with clear electrical tape (leave a small gap between the two pieces so that the board will fold neatly). These boards make it easier for kids to place the cards in an orderly manner.

Because many of the apple stickers were very similar, this was great visual discrimination practice. I also had the kids describe the differences to me (ex: "This one has a fat worm on the side, this one has a long skinny worm on the side, so they are different."), so it became some good vocabulary practice as well.
Tissue paper apples

I drew an apple shape with a leaf and stem on a white piece of constrruction paper and cut it out. I then let Andrew color the leaf and stem, then he used tissue paper squares to fill in the apple. (We used the old-school "wrap the tissue on the end of a pencil and dip in glue and paste on" method.) This gives the apple some dimension.
I recommend this art project for the older preschooler set, because it is time consuming and requires quite a bit of coordination. If you want to adapt it for younger children, just have them use a glue stick and lay the tissue paper squares flat onto the apple shape.
Letter matching

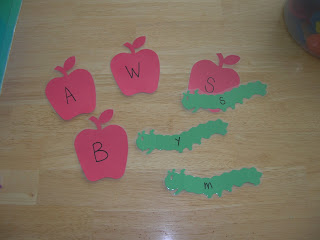
I die cut 26 apples and 26 worms, wrote the uppercase alphabet on the apples and the lowercase alphabet on the worms and laminated them. Kids can then match the worm to the corresponding apple with the same letter.
Apple lacing

This is one of the foam shapes I used here to make a bunch of lacing cards. I just gave the kids the apple and a green lace, so they could have the "worm" eat around the apple.
Apple tree snack

I found this cute idea in an old issue of The Mailbox (a fantastic resource...). You have the kids frost the top of a graham cracker quarter and one side of a Ritz cracker with green frosting. Stick the graham cracker end with the frosting under the frosted Ritz to glue the pieces together. Then add 4 m&m's (red, yellow and/or green) to the top of the tree and eat. My kids loved this activity and requested we make "trees" again the next day (and the next...).
Enjoy the "fruits of your labors". Tomorrow, I'll post a few apple goodies for the whole family to enjoy!

I loved the apple snack and tissue paper apple in your unit! Hopefully we will try the snacks some time soon. Thanks for sharing!
ReplyDelete