Friday, May 13, 2011

Another Sticker Activity

One more sticker activity to add to your little bag of tricks:

Write your child's name (or sight words, letters, etc.) with a bold marker.  Have them use stickers to cover the letters, making a sticker name. 

Happy sticking!

Thursday, May 12, 2011

Sticker Counting

Here's another simple thing for your preschooler to do with all of your little chart stickers:  Sticker counting.


I used to make these sheets for Mr. One when he was a preschooler, and it would keep him occupied for large amounts of time.

Just use a marker or pen to draw boxes with numbers, and let those little fingers get to work sticking and counting.  Throw a sticker pad and several of these sheets in a baggie, and you have another easy activity bag!

Wednesday, May 11, 2011

Love is... Baby Teeth, Quarters and Sharing

On Mother's Day evening, Mr. One pulled out his first loose tooth.  I love that he made sure to brush his teeth before pulling his loose tooth out.  "It needs to be all clean for the tooth fairy," he told me.


He was so excited to stick his tiny tooth under his pillow for the tooth fairy to collect, that he had a hard time falling asleep. 

Waking before 6:30 am, he bounced into our room, declaring, "The tooth fairy left me TWO QUARTERS!"  This would have been much more exciting if he could have waited for at least a half an hour longer...

Oh, how I love the magic of childhood!  Believing that sweet fairies can sneak into your room and swap out dainty teeth for shiny quarters...

Then, the real magic of the moment began.

Without so much as missing a beat after his first exclamation, he said, "Oh, I have two quarters!  That means I could get one squeakie for me and one for Mr. Two.  Can I use my tooth fairy quarters for the vending machine at school, Mommy?"  (Do you know about the sqwishies or squinkies or whatever?  They are tiny animals that are made of squishy plastic that are apparently all the rage with little grade schoolers here.  I have to admit that I think they're cute, too.  I loved miniatures when I was in elementary school.)


I adore that he immediately thought of using the second quarter for his little brother and didn't think for one second about just getting two for himself.  It was so simple and selfless and it made me love him even more.  I wish that I could say that my instinct would be to share. 


Oh, the joy on their little faces as he brought two little creatures home, one tiny goat for the toothless wonder himself and one squishy green frog for his little brother.  It made me want to put two quarters under his pillow every night for a week!

Love is unhaltingly sharing your treasures with one you love, just because you want to bring them joy.

Monday, May 9, 2011

Little Mister Bowties

My brother was married in March.  All of the nephews and my brother wore bow ties for the wedding.  They looked adorable.  Since then, my boys only want to wear bow ties to church.  For Easter, I wanted to make them coordinating ties in spring colors.

I found this great tutorial on Delia Creates.  I followed her directions, except for one major step.  I didn't measure their necks with their collared shirt on, instead I just estimated.  This resulted in much too small bow ties.  As in, this wouldn't even fit Mr. Three's baby neck, too small.


This ended up being a good mistake because I had to modify the pattern to make them fit and I think it actually made them better.  Instead of attaching the swimsuit hook to the ends of the fabric, I added approximately 3 inches of elastic to one end of the tie.  I sandwiched the elastic between the layers of fabric and zig zag stitched it several times to secure the elastic and minimize fabric fraying.  I folded the exposed end of the elastic into a loop and zig zag stitched it in place.  I attached the swimsuit hook to the other end of the bowtie fabric and zig zag stitched it in place.  This made the tie easily removable (without having to re-tie the bow each time), and gave it the extra length and stretch to fit all three of my boys' necks.


I love these dapper boys!


Check in later in the week (hopefully) for a quick tutorial for turning the tie scraps into a cute flower pin for the girls (or in my case, for me, since I don't have any daughters :)).

Friday, May 6, 2011

Mother's Day Cards

*Spoiler alert!!!!*

If you are one of the grandmas in our family, stop reading now!


For Family Home Evening this week, we made Mother's Day cards for our grandmas.  I put out scrapbook paper, glue sticks, pens, hole punches and decorative scissors and let the oldest two make cards. 


They loved cutting and arranging the papers to make a card for each grandma. 


This was a simple project and I love that they were in creative control.  Happy Mother's Day!

Tuesday, May 3, 2011

Puzzle Blocks

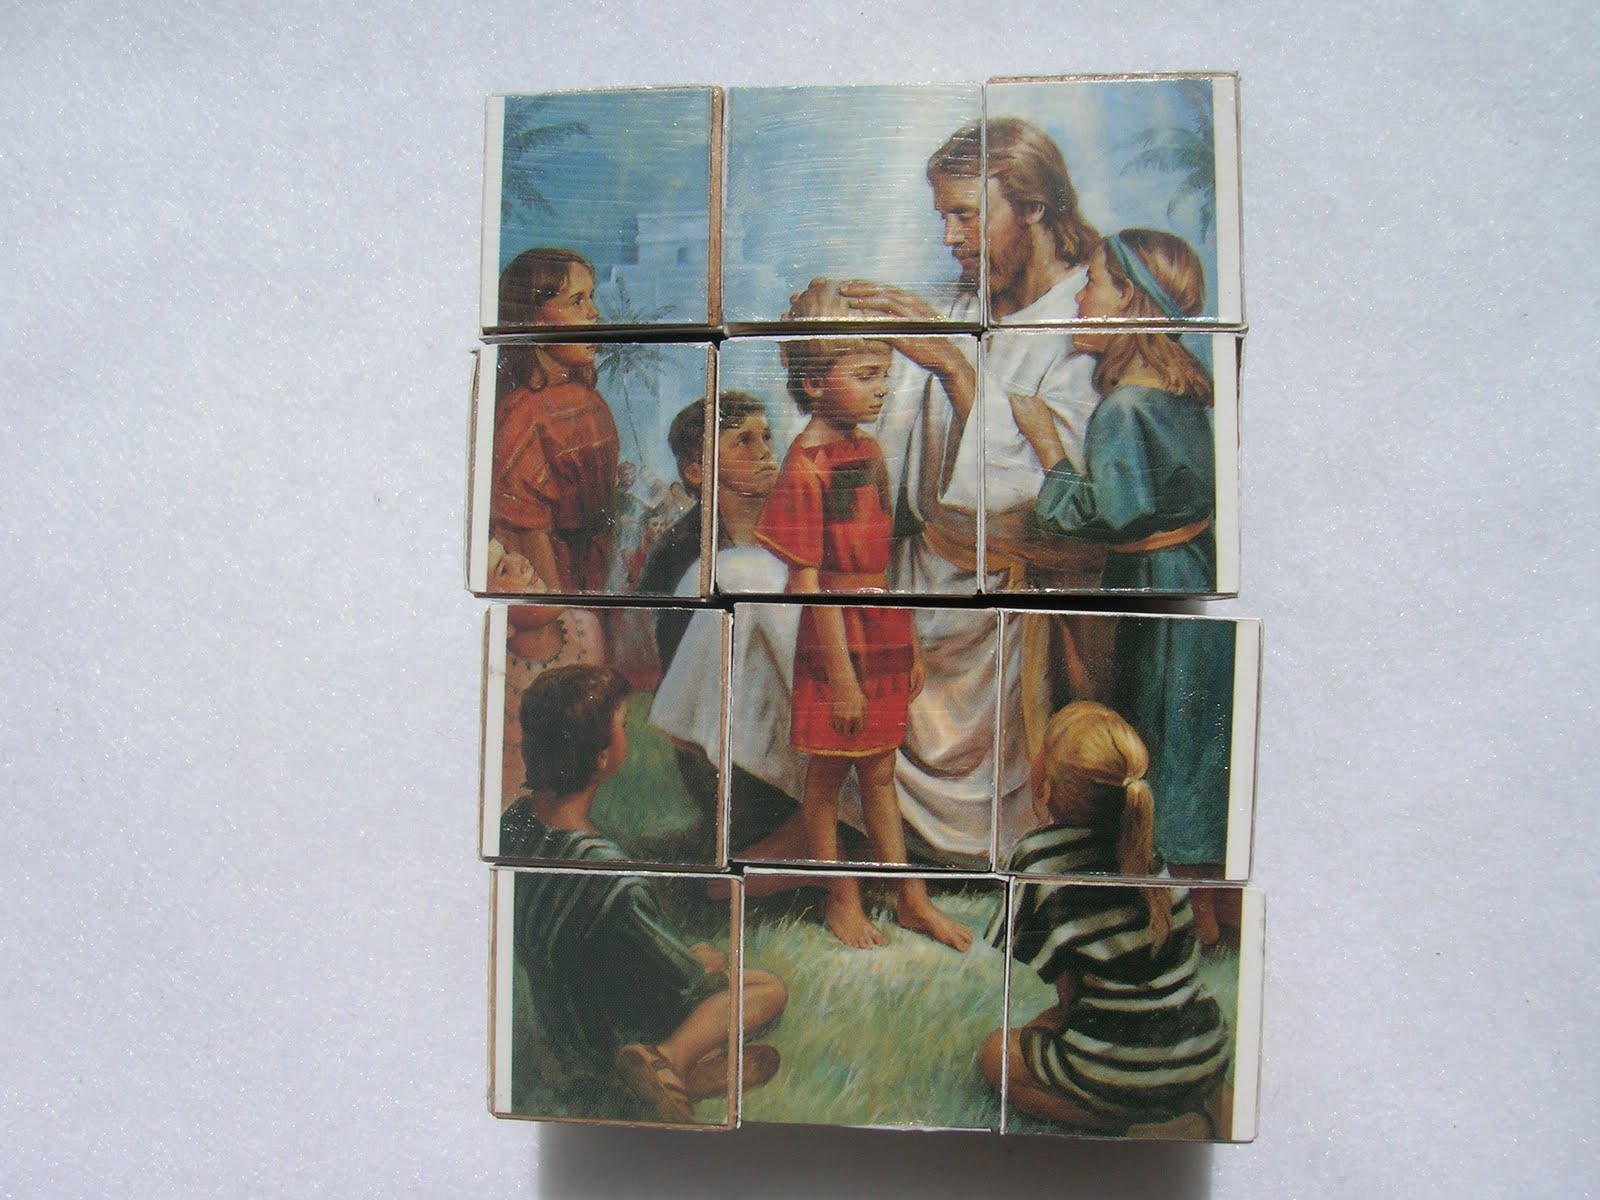
Mike's parents had a set of puzzle blocks in their toy chest.  I have wanted to make a set for years, but never got around to finishing this project.  For Easter, I wanted to add something new to our church bag for the boys to play quietly with.  I came up with the idea to make a set of puzzle blocks with pictures of Christ.  I tried to pick pictures that told a story.  Christ's birth, sitting with his mother Mary as a child, his baptism, blessing the children, Christ as the good shepherd, Christ calming the sea.  I figured, if they were going to play with something in church, I could at least make it something that would remind them of why we are at church in the first place...


Here's what I used:

one set of 1 inch wooden blocks (you can find them at most big craft stores)
Mod Podge and sponge brush
6 small cardstock prints (I found mine at Deseret Book and they were about 4"x3" each)
ruler and pencil
paper cutter, or scissors

First, the pictures I found were slightly larger than 3" by 4", so we trimmed each picture to those dimensions.

Mark lines on the back of one picture 1 inch apart to indicate where to cut.  You will end up with 12 1" squares.  Use paper cutter or scissors to cut squares.

Mod Podge the squares onto the 12 blocks.  Work on one picture at a time, gluing one piece of the picture onto each of the 12 blocks. (That way you won't glue two pieces of the same picture onto one block.)


Repeat process with remaining 5 pictures.  When you are done, you will have one set of puzzle blocks to build six different pictures.

Let dry completely.

Mod Podge a thin layer over each block the to seal your puzzle.  (Make sure that the side you are placing down is completely dry before setting down.  I speak from experience.  I have nearly ruined many a project because of impatience...)


A few tips for a better puzzle:


Choose pictures that have different coloring and/or backgrounds from each other.  The more unique each picture is, the easier it will be for kids to find the correct pieces.  One picture had a light sky background, another had a dark sea, another a dark interior background.

If you have two pictures with very similar colors, try and mix pieces on individual blocks to make it easier to identify which picture each side goes with. 

Here are pictures of each side of one block to help you better understand what I mean (sorry for the blurry picture quality).


The busier the scene, the easier the puzzle will be to put together.  Find pictures with lots of color, lots of details to the scenery (people in the background, animals, brick walls, instead of just dark color).  If you choose pictures with lots of solid background color and little detail, it will be much more difficult to assemble.

Now you will have a great small activity to put in your bag for your kids to enjoy.  Have fun putting your puzzle together!

Monday, May 2, 2011

Lacing Card Tip

Do your kiddos like lacing cards*?  Do they get frustrated when their lace end keeps slipping out of the holes, like mine do?

Here's my simple solution.  Tie a bead onto one end of your lace. 


This will keep the lace in place for your kids. 


Why didn't I think of this sooner?


Happy lacing!


*Want to make some lacing cards of your own?  Check out this past post.