Thursday, February 25, 2010
Excitedly Expecting
This weekend, we went on a tour of the hospital that Mr. Three will be delivered at. I don't really need another birthing class, but I do better when I know where I'm going. I waddled the hallways, hand in hand with my Handsome Husband and at least 11 other expectant mothers and spouses.
I have to admit a little irritation at the sheer number of other pregnant people in one place. I think maybe too many hormones in one room and a lack of sleep leads to this. I start worrying that we will all go into labor at the same time (you know, during one of those stormy full moon nights) and I will be delivering in the hallway or something. (Because I've already done this twice before and they will give priority treatment to the first-timers.)
Anyone else felt this sort of paranoia?
But I digress...
The hospital is lovely and the tour nurse helpful and so cheerful.
There was a tangible peace in the maternity wing. All those sweet newborns and the warm towels...
I swear every nurse there had a genuine smile on their face.
I even felt myself getting a little sentimentally misty-eyed in the labor room looking at the delivery bed, stirrups and all.
I really need some sleep.
What I guess my point in all of this is that I am so excited to see this new little guy. I want to hold him close and look into his puffy little eyes and smell him. Is there anything more heavenly than that new baby smell? Handsome Husband and I can decide who he looks like, and finally give him an official name. I can't wait!
I forget about the pain, the contractions and all of the other delivery stuff and just feel anticipation in the best sense.
Mr. One often says, "When is my new brother coming? I just want to see him!"
Mr. Two isn't too sure what is going on, but he knows change is coming and I don't think he's that thrilled. He still loves to point to my tummy and say, "There's the baby!"
Well, dear boys, your new brother is coming, like it or not, and there will be more than enough love to go around for all of us. I look forward to it.
*Do you love the pictures? My talented sister took them for me, in seriously minutes. (How does she do that?) Thank you Sarah! Check out some of her other work here.*
Monday, February 22, 2010
Heart Math Game
I am in my third trimester. I am tired and a bit grumpy. I had so many grand plans for heart themed activities.
I had to sneak one last Valentine's Day learning activity in.
At least we did one.
Here it is.
Valentine dice count
You will need:
2 dice
number board
conversation hearts
Directions:
To make the number board, cut a piece of construction paper in half, lengthwise so you have 2 long strips. Glue or tape together to make a long board, then mark out 12 spaces. Write the numbers 2 through 12(with a heart sticker "free space" in the middle) in each of the sections.
I am working on cooperation and turn taking with my boys, so we played this together. Each one rolled a die. We counted the dots together on both dice, then put a conversation heart on the corresponding number. I had the boys take turns placing the candy heart on the game board. If we rolled a number we already had covered, we rolled again until we got a new number. They loved this simple game, and played well together.
Friday, February 19, 2010
Sharing Some Love from my Bookshelf
I know Valentine's Day is past, but you don't need a holiday to show your children how much you love them. I have found and collected several books about love, and my boys never tire of hearing them. Here are just a few of my favorites, perfect for Valentine's Day, or just a good bedtime story.
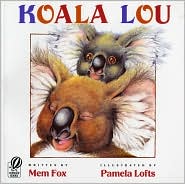
This is probably my favorite children's love book. Koala Lou is a sweet koala with a mom who loves her very much, and expresses it often. When more brothers and sisters come into their tree home, mother often doesn't tell her Koala Lou that she loves her, even though she certainly does. Koala Lou decides to enter the Bush Olympics and win a gold medal in hopes of hearing her mother's I love you. Find out what happens at the games, and more importantly, after. A reassuring and sweet tale of a mother's love.
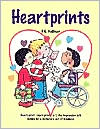
This book is a wonderful illustration of simple things that children can do to leave heartprints throughout their day. Heartprints are defined as "the impression left behind by a deliberate act of kindness." This is a great book for teaching the value of kindness and caring.
Simple, rhyming text gives metaphors to describe the feeling of love throughout the day. A perfect bedtime read.
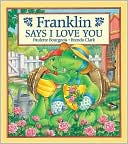
It's Franklin's mother's birthday and he wants to show her that he loves her without an expensive gift. Unsure of what to do, Franklin asks his friends for ideas. Find out what he does to show his mother that he loves her, and what she thinks is the best gift of all.
A great rhyming verse to reassure little ones that parents love them, no matter what their mood.
Silly and clever, this is a collection of animal love poems. This one is fun for kids, but sophisticated enough for parents to enjoy as well.
A fun little collection of descriptions of different types of kisses used throughout the day and around the world. From good morning kisses, butterfly kisses, I'm sorry kisses and bedtime kisses. For extra fun, there is even a page with how to say kiss in several different languages. There is also a companion book called A Book of Hugs. I'm on the lookout for an inexpensive copy of that one.
Grab someone in your home who needs some extra love, and share one of these books with them.
Love is reading to your children to let them know you care.
Koala Lou by Mem Fox
This is probably my favorite children's love book. Koala Lou is a sweet koala with a mom who loves her very much, and expresses it often. When more brothers and sisters come into their tree home, mother often doesn't tell her Koala Lou that she loves her, even though she certainly does. Koala Lou decides to enter the Bush Olympics and win a gold medal in hopes of hearing her mother's I love you. Find out what happens at the games, and more importantly, after. A reassuring and sweet tale of a mother's love.
Heartprints by P.K. Hallinan
This book is a wonderful illustration of simple things that children can do to leave heartprints throughout their day. Heartprints are defined as "the impression left behind by a deliberate act of kindness." This is a great book for teaching the value of kindness and caring.
Love is a Handful of Honey by Giles Andreae
Simple, rhyming text gives metaphors to describe the feeling of love throughout the day. A perfect bedtime read.
Franklin Says I Love You by Paulette Bourgeois
It's Franklin's mother's birthday and he wants to show her that he loves her without an expensive gift. Unsure of what to do, Franklin asks his friends for ideas. Find out what he does to show his mother that he loves her, and what she thinks is the best gift of all.
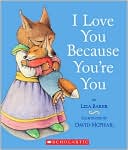
I Love You Because You're You by Liza Baker
A great rhyming verse to reassure little ones that parents love them, no matter what their mood.
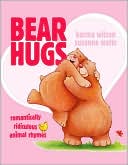
Bear Hugs by Karma Wilson and Suzanne Watts
Silly and clever, this is a collection of animal love poems. This one is fun for kids, but sophisticated enough for parents to enjoy as well.
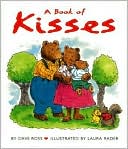
A Book of Kisses by Dave Ross
A fun little collection of descriptions of different types of kisses used throughout the day and around the world. From good morning kisses, butterfly kisses, I'm sorry kisses and bedtime kisses. For extra fun, there is even a page with how to say kiss in several different languages. There is also a companion book called A Book of Hugs. I'm on the lookout for an inexpensive copy of that one.
Grab someone in your home who needs some extra love, and share one of these books with them.
Love is reading to your children to let them know you care.
All images found on www.barnesandnoble.com
Wednesday, February 17, 2010
Brotherly Love
I snapped this sweet picture a few weekends ago when Mr. One was sick. Poor thing was throwing up and feverish and just plain exhausted.
Notice the little pile of cars beside him?
Mr. Two, knowing his big brother wasn't feeling well, placed them beside him to make him "not sad".
It's moments like this that make you remember that these active little boys, who have their fights and tussles, really do love and care for one another.
Love is trying to make someone else feel better, even if you can't make the hurt go away yourself.
Tuesday, February 16, 2010
Valentine's Day: Sharing the LOVE
Did you get to spend some quality time with your loved one(s) this Valentine's Day?
Here's a little synopsis of what we did to celebrate.
Earlier in the week, we sent out Valentines in the mail to our out of state family. We wanted to share the love with our family near and far. I let the boys pick out whatever cards they wanted (we ended up with some pretty funny selections, especially with Mr. Two's randomness), we signed them and mailed them off, sealed with a kiss.
On Saturday, Mike and I actually hired a babysitter and went out to dinner. I know this doesn't sound like a big deal, but when you can count the number of times you have hired a babysitter and/or gone out to a real restaurant in the past year on one hand, well then, it becomes a big deal. We went to Gecko Grill (love, love, love their food...) and enjoyed some quality time without children. After dropping the sitter off and putting the kiddos to bed, we watched Julie and Julia and snuggled. Hooray for date night!
Sunday started off with pink waffles and syrup (drat, I wish strawberries were in season...) and pink milk. Both boys ate two waffles each! I love my food coloring...
After church, we ate dinner at my parents' house. We normally have a red dinner, with some sort of red pasta, red jello, etc. This year, we went outside of the box and ate something different. We still had the candlelit table and fancy dishes, but we did change up the menu. We had crepes with beef and mushrooms and chicken in sauce for the non-red-meat-eaters (ahem, me), grilled asparagus, salad, and cranberry Sierra Mist (we had to have at least one red thing...). Then for dessert: classic cheesecake, sugar cookies, and extra cake pops. Talk about sugar overload, but boy was it good!
Mike and I picked out books for the boys for their little gift.
I gave Mike some chocolate-covered treats (cherries, coconut almonds and cashew clusters).
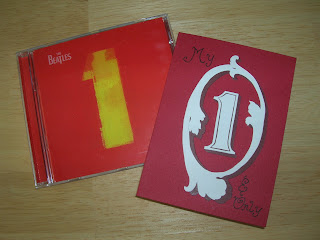
He gave me the Beatles album 1, and yes, he made the card (it says, "My 1 and Only").
Hoping all of you had a love-filled Valentine's Day!
Here's a little synopsis of what we did to celebrate.
Earlier in the week, we sent out Valentines in the mail to our out of state family. We wanted to share the love with our family near and far. I let the boys pick out whatever cards they wanted (we ended up with some pretty funny selections, especially with Mr. Two's randomness), we signed them and mailed them off, sealed with a kiss.
On Saturday, Mike and I actually hired a babysitter and went out to dinner. I know this doesn't sound like a big deal, but when you can count the number of times you have hired a babysitter and/or gone out to a real restaurant in the past year on one hand, well then, it becomes a big deal. We went to Gecko Grill (love, love, love their food...) and enjoyed some quality time without children. After dropping the sitter off and putting the kiddos to bed, we watched Julie and Julia and snuggled. Hooray for date night!
Sunday started off with pink waffles and syrup (drat, I wish strawberries were in season...) and pink milk. Both boys ate two waffles each! I love my food coloring...
After church, we ate dinner at my parents' house. We normally have a red dinner, with some sort of red pasta, red jello, etc. This year, we went outside of the box and ate something different. We still had the candlelit table and fancy dishes, but we did change up the menu. We had crepes with beef and mushrooms and chicken in sauce for the non-red-meat-eaters (ahem, me), grilled asparagus, salad, and cranberry Sierra Mist (we had to have at least one red thing...). Then for dessert: classic cheesecake, sugar cookies, and extra cake pops. Talk about sugar overload, but boy was it good!
Mr. One's gift
Mr. Two's Gift
Mike and I picked out books for the boys for their little gift.
I gave Mike some chocolate-covered treats (cherries, coconut almonds and cashew clusters).
He gave me the Beatles album 1, and yes, he made the card (it says, "My 1 and Only").
Hoping all of you had a love-filled Valentine's Day!
Monday, February 15, 2010
Handmade Valentines, on a Budget
For Mr. One's preschool, we made our own Valentines for his classmates, as well as a treat for his teacher and classroom aide, on a budget, of course.
I had seen this tutorial, and several variations, floating around the blogging world. I thought this would be something easy and fun to put together, not to mention inexpensive.
I found the mini candy canes on 75 percent off clearance after Christmas, bought the baggies and lollipop sticks with half off coupons. The Valentine pencils were from the Dollar Spot at Target. The paper, stickers and ribbon were all supplies we had on hand. I think the grand total for the whole project hovered around $4.00. All the supplies for the teacher treats were already on hand.
I had Mr. One arrange the candy canes into a heart shape on parchment paper. We baked them on 300 degrees for 5 minutes, then I quickly pinched the ends around the lollipop stick. (Skip to My Lou has more detailed directions.)
I cut out heart shapes, punched a whole in the top and wrote "It's sweet to be your friend" on the front. My son signed the backs and decorated them with stickers.
A little suggestion for signing Valentines with a preschooler- just have your kiddos sign a few at a time, then move onto something else so they don't get frustrated. I had my preschooler sign four, then decorate them with stickers, then sign four more, then decorate, until they were done.
We sandwiched the cooled and bagged suckers between the tag and pencil and tied it all off with curling ribbon.
For the teachers, we made Cake Pops (go to Bakerella for details). I used a chocolate cake mix with cherry frosting, then covered them with semi-sweet Ghiradelli chocolate (you know, the giant bag of chips you can buy at Costco...). They tasted just like a good chocolate covered cherry. Yum! It was a lot of work, but some good, messy fun with Mr. Two (who loves a good food mess, and wanted to do something fun with Mommy too...) I put them in a red-lidded plastic container and tied it off with a tag, sucker and curling ribbon.
One fun variation on the candy cane suckers:
I crushed up some red and pink Jolly Ranchers and carefully sprinkled them into the inside of the candy cane heart before baking them. The Jolly Ranchers melted inside and made a pink tinted window in the heart. I tried to convince Mr. One that this would be fun to do for his classmates' suckers, but he was insistent on keeping them "plain." I wanted him to have ownership of this project, and I let him choose.
So I made some on my own, the "fancy" way to give to others...
Thursday, February 11, 2010
I "Heart" Bead Crafts
Valentine's Day is one of the only holidays I can get away with encouraging my boys to use pink and purple beads to make something.
And I have a lot of "girl colored" beads (as Mr. One would call them)...
Here is a simple craft we worked on together for Valentine's Day.
You will need:
Valentine colored tri beads (we used pinks, purples and reds)
pipe cleaner (we used red)
Directions:
I had Mr. One sort our bead stash, pulling out the appropriate colors for our project and placing them on a large tray, then putting the other colors in an ice cube tray.
When we had a good pile of the beads we wanted, I had the boys string them onto the pipe cleaner, leaving approximately 1 inch of pipe cleaner exposed on both ends.
My four-year-old could do this independently. I sat with my two-year-old and had him pick up the beads, one at a time, and we strung them together. He actually got pretty good at lining up the little hole onto the end of the pipe cleaner and pushing it down.
After the beads were on, I bent the pipe cleaner into a heart shape, beginning and ending the heart at the far end of one of the top curves. I then twisted the ends together and made a loop, twisting the ends again. I liked the look of the hearts hanging at an angle.
Go get out your bead stash and have some fun!
Wednesday, February 10, 2010
I Love Books, Valentine's Day Edition
Oh how I love pulling out a "new" bunch of stories to read with my children. Here are some of my favorite Valentine's Day picks.
Froggy's First Kiss by Jonathan London
Of course we have to list a Froggy book, and this one is adorable. Froggy has a not-so-secret admirer. A funnny look at "first loves." Find out who will get Froggy's extra special Valentine.Franklin's Valentines by Paulette Bourgeois
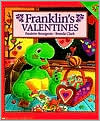
Poor Franklin drops his carefully made Valentines in the snow, and they are ruined. Franklin thinks his Valentine's Day is ruined as well. Find out how his classmates respond and what he does to show them how much he appreciates their friendship.Mouse's First Valentine by Lauren Thompson
Sweet and simple. My kids love guessing what Mouse sees his sister pull out from around the house as she creates something special for Valentine's Day.Little Mouse's Big Valentine by Thacher Hurd
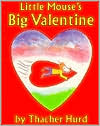
Little Mouse creates a BIG Valentine, but has trouble giving it away, until he makes a new friend. Together they work out a clever solution. The Day it Rained Hearts by Felicia Bond
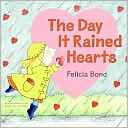
Cornelia Augusta comes outside one day to find it is raining hearts. She gathers several, then goes to work creating some unique Valentines for each of her friends. Such a creative book. This story is the perfect springboard for making Valentines together.
Gather some loved ones and read a Valentine's Book or two.
*all images found on barnesandnoble.com*
Tuesday, February 9, 2010
Why the World Needs More Uncles
Last week, I had my brother come over and watch the younger children for a few minutes while I picked up Mr. One from preschool. Not only did he come over willingly, but he volunteered to stay a bit after we returned and play a few games with them. Mr. One was having a particularly rough day, so my sweet 19 year old brother, scooped him up, hugged him and talked to him for a good amount of time to encourage and help him feel better. We need more young men like this. We need more hugs and encouragement. We need a cool uncle to listen. If we all had that, the world would be a lot better place.
Love is taking a few minutes out of a busy schedule to scoop up a nephew and let them know you care.
Love is taking a few minutes out of a busy schedule to scoop up a nephew and let them know you care.
Monday, February 8, 2010
Valentine Pillow
Love is in the air. Here is one of my Valentine's projects from last year. I found the idea for this pillow here (via Tip Junkie), then changed it a bit.
I used some white cotton fabric I had on hand for the pillow case and turned it into a slip cover instead of making it a complete pillow. I basically made a pillowcase and sewed in ribbon ties on the open end to tie the pillow closed. (I'm sure Martha Stewart has a good tutorial for doing this in a more precise way.) I used red thread and straight stitched two rows of stitching to frame out the pillow. I used a combination of red and pink buttons I had on hand to make a more folk-art inspired heart (I didn't want it to be symmetrical). It was a simple way to jazz up a boring old pillow, and I can recover the same pillow when Valentine's Day is over with something different.
*hop over to Blue Cricket Design to see other crafty projects*
Wednesday, February 3, 2010
Four Year Old Logic
A few funnies from Mr. One, who is 4, almost 5. (Don't you love this adorable face?!)
Mr. One loves to sit by me and often asks to feel the baby move. One day, he put his hand on my ever-expanding tummy, right on my belly button and exclaimed, "Mommy, I feel my brother's tiny foot!" To which I had to reply, "Sorry darling, that is my belly button."
On Sunday, we were over at my parents' home for a get together for my brother who is leaving on a mission for our church to Brazil in a little more than a week. There were lots of chairs up for visiting family and friends. In between waves of people over, Mr. One was playing around in a large director's type camping chair, leaning forward and tipping it over. I explained that he needed to stop, not only to keep himself safe, but especially because he was teaching his brother unsafe things as well. He stopped for a minute, then started dragging the chair around behind the sofas. Then, I heard him explain to my sister, "I need to move this chair away from my brother so he can't see what I'm doing. I'm going to do something really cool now." That gave us a good giggle or two.
Gotta love that four year old logic!
Tuesday, February 2, 2010
The Anatomy of Peace
In the book club I belong to, our book for February is The Anatomy of Peace: Resolving the Heart of Conflict by the Arbinger Institute.
I'm not really an avid non-fiction reader, and even more reluctant to pick up books that are heavy on philosophy or psychology, so I hesitated to open this one up. Nevertheless, I heard from several people that it was actually an engaging book, and the title did have peace in it...
It is actually written as a story, with a group of parents who have just dropped off their children at a survival camp for troubled young adults. So, most of the book, while delving into the heart of conflict and peace in relationships, is written in a conversational style, with two teachers, the founders of the camp, talking with the parents and responding to their questions and hesitations.
This was a great book for my new year's goal of peace.
It contains so many thought-provoking ideas to help people resolve conflict and find peace, as individuals, as families, businesses and even countries. It made me really think about how I interact with my children and family, and how I perceive others in my life. One of the most powerful concepts it taught was that we choose whether to have a heart at peace or at war, by seeing people as people or objects, and based on this choice, all other choices flow from this simple decision. The other important concept is that there is hope to resolve conflict. We have the power to make lasting changes in ourselves, and then we can begin to heal any damaged relationship.
I can't even adequately explain this book, but it will be one that I will add to my library and look forward to revisiting.
Monday, February 1, 2010
ABC Magnet Spruce-Up
Somewhere in blogland (or was it a magazine or at a friend's home, I wish I could remember where...) I saw the idea for this project. The idea was simple: Take a set of primary colored, kids abc magnets and personalize them with your choice of colors to match your decor. I love having abc magnets on the fridge for my kids to use, but the bright primary colors don't appeal to my design aesthetic. Here is the perfect solution.
I have been wanting to complete this project for a long time. I finally accumulated the supplies I needed and found the scrapbook paper that I liked, and went to work. (The hardest thing for me was finding the paper I liked.) This project took two days for me to finish, all in all, about 4-5 hours (I worked on it throughout the two days when I had time).
Here's what you need:
One set of alphabet magnets. I used a Melissa and Doug set that I bought on sale.
Mod Podge (I used matte finish because my paper had glitter embellishment on some of it)
foam paint brush
x-acto knife
cutting mat
either a scrapbook paper pad or select your own coordinating scrapbook papers to match your decor (cardstock papers will work best on this project) I used the DCWV Garden Party Stack.
paper cutter and/or scissors
cheap nail files or sand paper (I found a package of 4 files at the Dollar Tree)
The Directions:
1. Lay your letters on your paper and cut rectangles slightly larger than your letters. (My picture makes it look as though I cut the paper smaller than the letter. It's just the camera angle. Sorry!)
2. Use your nail file (or sand paper) to rough up the front of your magnet letters. This will help the paper adhere better to the fronts of the magnets.
3. Apply a layer of mod podge to the magnet fronts and adhere the paper to the front.
4. Lay magnet, paper side down on a flat surface to dry. (This is where I stopped working on day one, allowing plenty of time for the mod podge to dry.)
5. With an X-acto knife, cut along the letters. Don't worry about being precise, just get close. You will be sanding the letters to get a smooth edge as your next step.
6. Using your nail file (or sand paper), file along all the edges of the letters to file off any extra paper create a smooth edge. For the small spaces, like the curve in the s and the insides of the the letter B, I cut the end of my file off and cut that in half to make a narrower file. (If you buy cheap ones, no worries about ruining one.)You can file along the top as well to give the magnets a more distressed look.
7. Wipe magnets with a cloth to remove and dust from sanding.
8. Apply a solid coat of mod podge over the tops of the letters to seal them.
9. Lay letters, paper side up on a flat surface to dry.
Before
After
*My boys have already gone to town with these letters, ith Mr. One spelling their names, and things they like, such as "Zurg" and "Buzz" and Mr. Two rearranging them...
*Hop on over to Today's Creative Blog to see what other crafty projects are being posted!
Subscribe to:
Comments (Atom)


