Today is part one: Travel Treasures, aka stuff we brought with us/made to keep our kids entertained this time.
I found some fabulous ideas for activities online that I had bookmarked for some time. I snuck in a few moments here and there to put together some "goodies" for the boys.

First off, I found this idea from Chasing Cheerios (fabulous blog with ideas for the toddler/preschool set). I already had the tangram pieces, and I cut up old refrigerator magnet ads and double-stick taped them to the back of the pieces. I don't have a laminator (oh how I wish...), but I did have some clear contact paper, so I laminated them that way. I used our little pan from our toaster oven to stick the shapes to. (Hooray for free crafts!) This was one of the best activities for Andrew. The pictures are still a bit difficult for him to recreate, but he gave it a good "college try" and enjoyed just manipulating the shapes into his own designs. This idea is a definite keeper.
 I found this idea on Totally Tots from Making Learning Fun. I wanted it to be more portable, so I hole punched the contact paper laminated cards and attached them to an o-ring, and added velcro to the pieces and to the shapes on the cards. I put the pieces in a snack sized ziploc baggie and attached it to the ring as well. I was originally thinking this would be fun for Ben (he's really into shapes and colors right now), but Andrew liked matching them. Honestly, they didn't really play with this one on our trip, but I still think they'll love playing with it another time.

I also decided to make two Tot Books for the boys, one for Andrew (Cars) and one for Ben (Farm). I LOVE this concept. Carissa, who runs this site, has lots of great preschool ideas, and was a former kinder teacher, too. I will be doing more of these in the future. The boys didn't really use the farm book (something fun for another time), but I changed the format of the Cars Tot Book, and made the mini books into pull out mini books (I didn't glue them onto the folder, I created a pocket to store them in and put rings on the spines so they would open and close more easily) so that they could pull them out of the folder.
 So, after all of my printing, cutting, assembling madness, I was feeling pretty good about my abilities to entertain my kids on the cheap (well, on the "free" is more like it). Then, a thoughtful friend came over and dropped off this basket of treasures for my kids. Even more fun! Inside were treats, baby books for Ben, cars, some activity books for Andrew, and wet wipes. One of the books was a Suprise ink book with a magic marker. When you color on the pages, hidden pictures appear. Andrew especially loved this one. I will be looking for those again.
Here's Andrew's idea of coloring with the suprise ink:

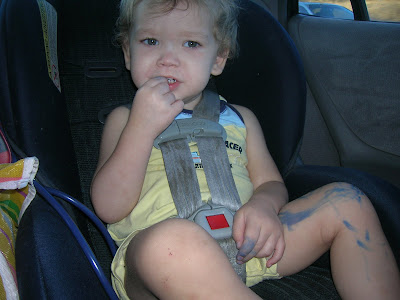
Here's Ben's idea of coloring with the suprise ink:

Note to self: Keep suprise ink away from toddlers.
Another note to self: Suprise ink comes out of clothes fairly well with a little Shout (thank goodness).
It was fun to have lots of little suprises to give the boys on each leg of our trip. It kept them excited about being on the road again, and meant much less whining (ya for mom and dad!).
More on our trip to come...


